Honda Twins banner

1973 CB350G - Canadian Noob Build (Gotta start somewhere!)

112K views 419 replies 66 participants last post by  LiamG6  
#1 · (Edited)
We've all been there. A new endeavor. Something unfamiliar yet you're ready to face the challenge. So I will try to keep these posts short and concise and right off the bat will say how glad I am to have found this forum. I've been kicking around on here since mid summer of 2014 because I've always been interested in Honda twins (esp the CB family). I signed up in November after buying a CB350 in the Fall and have already had such a positive experience with the people on here, so thank you in advance for all the help as I will no doubt have a lot of questions. I like to learn. I think it's important to ask a lot of questions and I respect wisdom. I am a hands on learner and often jump in head first when I am passionate about something. This is what prompted me to start my own project and build something I can be proud of.

A little about me.. My father was a machinist and hails from merry old England. So naturally he thinks he's "smarter than these daft Canadians". He's a funny old chap, goes by the name "Crazy Joe". That's the nickname the fellows in the factory called him because he's a funny guy, always making people laugh. He's mechanically inclined, has all the tools and taught me how to drive and the importance of maintaining my vehicles. I would not call myself a mechanic by any stretch of the imagination, but I do know a thing or two and I can be quite resourceful when I need to be. Now, I know you what you might be thinking.. "Great another hipster with a beard and a bubble shield who thinks he's a bike builder". Although I will admit I do have a pretty mean beard at the moment and a bubble shield, I am NO bike builder! I promise not to "hack" this bike together. I want to learn. I am very interested in your input, that's why I'm here. I want to accomplish this. I'll just watch all of Ichiban Moto's "Bad Ass" YouTube videos and I'll be all set right?! haha.. No for real, this is something I've always wanted to do and I love it!

Enough rambling! Sorry. Here's what I am dealing with...

It's a 1973 CB350G (the one with the front disc brake). I purchased the bike for more than I would like to admit ($1500) and it was not running ( I know, I know..). I justified the price because CB350's are in demand in the area I live in and there are not many around, especially so close to where I live. Also, he gave me a box of parts with it. I was happy. It had been buried deep in his garage for approx 3 years and was starting to get some surface rust and a whole lot of cobwebs. It has approx 33,000 miles (seems a lot but I intend to rebuild the engine), battery was dead, 3 yr old gas in the tank with rust inside the tank, engine turned over, brakes not ceased, tyres almost brand new. I came to the conclusion that the bike was well maintained and decided to go for it.

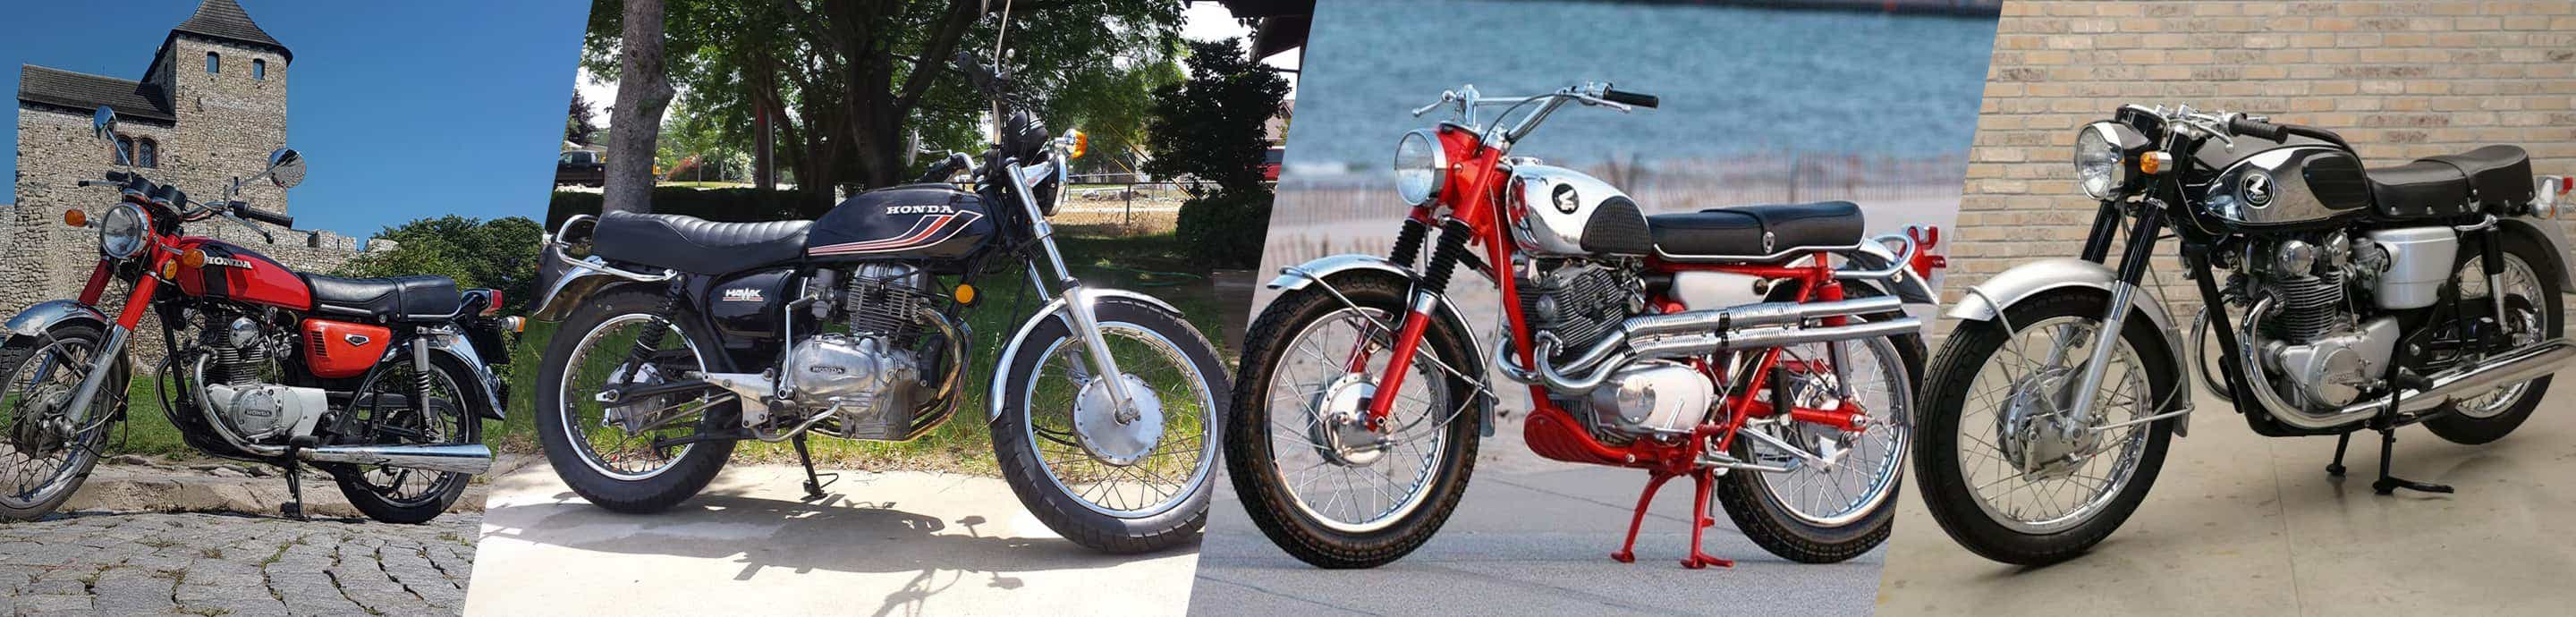
1st time out of the garage in 3yrs! Not bad shape at all.


Snuggled in the garage for the winter.


What I intend to do:
- dismantle entire bike
- recondition all aluminum to mirror shine
- rebuild engine with upgrades
- fresh PC on frame and select parts
- upgraded rims, spokes and tyres
- upgraded front brake, possibly dual disc
- upgraded suspension in front and rear, stock forks rebuilt, possible inverted forks??
- custom seat, headlight, running/brake light
- clip on bars, upgraded front controls
- brand new wiring harness with Motogadet M-unit & components
- upgraded battery
- redesigned and repainted tank
- upgraded chain and sprockets
- possible upgrade to electronic ignition system
- upgraded rear sets

I'll post more of where I'm currently tomorrow and some pics of the inspiration I have been cultivating. Thanks and sorry again for such a long post, they will be short and more concise in the future.
 
#2 ·
have you considered riding it?

you have a long list of changes you want to do but I'd suggest you make it a safe and reliable bike and ride it for a season before you begin changing it. clip ons and rearsets can make the bike very uncomfortable if you don't get the riding position done properly.

Motogadget electrics are very nice...the stock bits are well designed and function very well also

upside down forks make the front end disproportionately stiff compared to the rest of the bike...actually make the bike handle worse in many cases, not to mention can be very expensive. slightly larger diameter traditional forks with cartridge emulators is a more balance approach. welding up the seams and bracing the frame combined with good rear shocks will make it handle better. then the swingarm becomes the weak link...can be braced or you can adapt a box section square swingarm to complete the handling package.

I use the 36 spoke Yamaha xs 650 front hubs with modern brembo rotors (many guzzi and ducati hubs have the same bolt pattern and are direct bolt ons) then you only need to machine caliper brackets. given the bikes weight and performance, dual discs are not necessary...just adds extra unsprung weight (not good for handling) a modern master cylinder and caliper is also a good upgrade

new rims and spokes are a good investment which allows you to fit wider modern tires...don't go beyond a 90/90/18 on front (18 x 2.15 rim) and 110/80/18 on rear (18 x 2.50 rear rim)
electronic ignition is a good investment
Rick's electrics stator and R/R is a very good upgrade and will allow brighter headlight and keep your battery healthy longer.
 
#3 ·
Thanks for the info outobie, I've seen your replies a lot throughout the forum and you always have great advice. I will no doubt need your input throughout the build.

I respect what you're saying about making the bike safe and riding it but this is my 4th bike and I fully realize the changes I want to make will affect the riding position, etc. I have rear sets and clip-ons on my Virago so I'm used to the position. Also, these are preliminary plans as you'll see from some of the inspiration photos I'll post later, it might take a different turn with the handlebars and riding position because you're right, it's not the most comfortable.

I'm glad you commented on the inverted forks/dual disc brake because that's exactly what I was looking for input on, hence why they were only "possible" upgrades. I don't want to modify the bike to far from stock because I think these bikes are set up quite well as it is. I just thought the dual disc might look cool in the front, but not if it compromises the handling.

About the rims/tyres.. For the style I am going for, it seems that for that size (90/90-18 and 100/90-18) basically the only tyre that I really like and that will fit is the Avon RoadRider AM26. A great tyre and no wonder I seem to see them on a lot of builds. I contacted the manufacturer about the rim size and they stated that they could only recommend to go with what is stock on the bike as is, so 1.85 on the 90/90 and 2.15 on the 100/90. I also contacted Kennie Buchanan in California of Buchanan Spokes and he also recommended that size and says it works perfectly! Said not to go any wider as the bike will become ponderous.

Anyway, thanks a lot for your input and I hope you will continue with it throughout the build process.
 
#4 ·
You certainly have a great starting point. Welcome to the forum. You are in great hands with outobie.
 
#5 ·
go with what is stock on the bike as is, so 1.85 on the 90/90 and 2.15
stock rims are 1.60 x 18 front and 1.85 x 18 rear.

that said I agree with the recommendations from Buchannan's as being the best choice (1.85 on the 90/90 and 2.15 on the 100/90.)...my comment was to not go larger than what I posted above. (sooooooooo many new café/bobber builders automatically think bigger is better)

there are now radial tires available by Micheline (classic attack) that I'm going to try on my next 350...their sizes are a tad larger than I'd like but am curious to compare the radials to the Avon's which I've used for years on many bikes.
 
#7 ·
so far the classic attack front tire is a 19 no 18 yet in a usable size..

I'm lacing up a set of rims now...2.50 x 18 rear and 2.15 x 19 front to run them in the spring
 
#8 ·
Here is some inspiration pics for now that I have gathered from just doing a little research online. I don't know if I want to go with clip-ons or clubman style. I don't think I will go with a cafe style seat but rather a more bobber style with the end kicked up slightly so it's not like a diving board.

My top 2 pics for inspiration:


other awesome stuff that makes me excited about this project:


Build progress pics/video to come. In the meantime does anyone have any advice for cleaning/shining the aluminum parts?
I would like the side covers to be nice and clean like BOTs bike===>


Thanks!
:)
 
#10 ·
Everyone has to start somewhere. I recently delved into the CB350 world. I want to take what someone else gave up on and create something more dynamic. My first time doing a motorcycle tear down and rebuild but I work on Fighter aircraft and think with all the help from these forums that I will succeed. Keep us posted on your progress.
 
#11 ·
Cheers Blkdog, I will. Your project sounds fun also, if you have a thread feel free to share and I will sub to it. Always good to learn together :geek:

Back to the progress! My first teardown session went pretty smoothly. I am learning a lot as I go and just taking my time with it. Again, if you see or read about me doing anything out of the ordinary I would love to hear your feedback. I want to learn as much as possible.

Please excuse the mess in the background of the pictures and video. It's not my house and I don't live there but if it were up to me, 90% of the stuff would be in the junk yard! I'm working with what I have and things are getting done. I plan to organize more over the holidays.

I will be documenting this entire process on YouTube. I plan to even visit/interview some mechanics/builders/fellow riders for input down the road so it should be an interesting series to learn from and I hope you subscribe and follow along with me.

Here is episode 1 of my project:

I know what you're thinking.. "Where'd you get that badass intro music?!" .. I made it! lol Doesn't get much more homemade than that! It makes me laugh every time though :lol:

Here are some pictures of my first wrench:


#12 ·
Well it is cleaner than my garage . HaHa!
Good luck
 
  • Like
Reactions: Saturdays Wrench
#14 ·
For my second session, I removed the tank, carbs, exhaust, headlight and the electrical harness. The tank is very rusted inside and will need a good wash. In my research I found that vinegar/water and some loose ball bearings or small nuts & bolts with a hefty shake and left for 24hrs is a good cheap way to clean out most of the rust from inside the tank. Can anyone attest? Have any better ideas or recommended products?

While removing the tank I spilled a bunch of gas out of that cross flow tube that's under the tank. Is this just to distribute the gas evenly in the tank? If not what is that for? What if you need to remove your tank on the road and it is full of gas, is there any way of removing the tank without spilling when detaching that cross flow tube or is this normal? The gas sat in the tank for 3 years, so it was pretty smelly. I got a good buzz emptying it though haha..

While I was taking out the harness I was making notes as to where things came and went. I have to admit I a little intimidated before exploring it, but after I took it all apart I realized there's really nothing to it at all and am looking forward to tackling the wiring myself when it comes to it.

Here's the second installment of my Youtube series for the build:


#15 ·
Yes, you are right about the crossover tube. There is a shut-off valve for sale which makes things easier
when removing the tank. I will try and find a link.
I do not have one so not sure if they are that usefull or not.
Someone else should chime in on the subject.
Nice build thread. I will follow.
How much snow did you get?
 
#16 ·
Google Motion pro double shutoff 1/4" fuel quick connect
 
#19 ·
Tony,

We got a ton of rain here in Halifax. No snow though! Thursday it was 13 degrees out, took the ol XS650 for a drive. Felt great!

I really enjoyed your youtube video! Excellent work~
Awesome, ya I saw a few people out in Toronto this weekend! Really warmed up quickly. I'm glad you enjoyed it! Thanks!
 
#20 ·
For my 3rd session, I drained the oil, dismantled the front controls and loosened my crankcase covers while the engine was bolted to the frame. I got a little ahead of myself and did not research enough about the oil filter on these bikes. I went looking for a disposable oil filter and only realized there was one built into the engine, staring me in the face after I had done some research and looked at the manual. Good lesson to be learned there.. RTFM... every time. Chalk that one up to an eager rookie mistake.

I ran into a few stripped bolts on the left side of the crankcase, so I could not get to the sprocket to remove it. I've already figured that I am going to drill into them with an 8mm drill bit. That way I can get to the sprocket and remove it so I can move on with the rear wheel. I do not have a chain breaking tool, so it's my only option for now.

No more major surprises with this wrench sesh, was cool poking through the front controls figuring out how they work. I also enjoyed peeking behind some of the crankcase covers at the clutch, stator and what I know now to be the oil filter. I'm looking forward to getting the rear wheel off so I can move on with the teardown.

I removed the old gas from the float bowls in the carbs and saw that they were in pretty great shape when I looked inside. I cleaned them up and sprayed a little WD40 in the bowls, put them back together and sealed them in a ziplock bag for storage.

Check it out:


#23 ·
While external springs CAN be added to your plunger (or cartridge-type) forks on the "G" model, you will have to find or fabricate the "cups" to retain the springs as well....(and remove the original internal springs).....
Note that in the picture you posted, a NECESSARY plastic inner spring guide has been deleted simply for "looks" (or the owner didn't understand their purpose)...For reference, you can simply compare the parts fiches for your "G" forks and the earlier CB350 K2 forks for example...Without them, the springs can damage the fork tubes, wearing the sealing area of the forks, and causing fork oil leaks....not to mention removing chrome and allowing rusting...
 
#27 · (Edited)
Sweet! Thanks man.

So for my 4th session I wanted to tackle those striped bolts on the crank case cover and remove the sprocket, chain, rear wheel, swing arm and shocks. After talking it over with my buddy Rob, an experienced bike builder who runs Bullit Customs Cycles, I felt pretty confident that this was the way to go. Luckily my dad (aka "Crazy Joe") has like every tool imaginable, so he knew exactly what I needed when I told him what was going on. He busts out an 8mm metal drill bit and I go to town on the bolts.. Eats through them with no problems and I get the cover off. Didn't even need vice grips when I got the cover off, which is a bit perplexing, just loosened the studs with my fingers. I know some people say not to drill into the case but it was my only option at that point. Damage to the case was very very minimal.. plus I kind of like the battle scars.

The chain and rear wheel assembly came off with no problems at all, same with the shocks and swing arm. I am actually feeling really good about this tear down. I never realized how amazing I would feel after going through the bike like this and I seriously recommend it to those of you who are unfamiliar with their bikes or just don't feel comfortable. Just get yourself a manual and take something apart! I seriously feel like I am really understanding the vehicle so much more the further I get into this.. it's a great feeling.

Here's the video if you're interested to see how it all went:


#28 ·
Happy Holidays everyone and Happy New Year!

For my 5th session, I took the engine out of the frame and removed the front fork assembly. The engine was pretty tricky to take out seeing as I had to use my dads car jack! With my dad steadying the frame I was able to slide it out. Good thing for the manual on this one as it said to take the engine out from the right side. I did not realize the frame was lower on that side, making engine removal easier, until I removed the engine. Another reason to always look at the manual ahead of time.. Learning that more and more as I go.

Really excited to see the engine out and the frame bare!! So many things I can move on with now like modifying the frame to fit a hoop and custom seat. I am really looking forward to using the angle grinder on that!

Here's my exploits in engine and fork removal:


#33 ·
When you replace the motor remove the Exhaust Studs to give yourself a little more front clearance.
It makes the process easier and you won't scratch up a fresh painted frame.
 
#34 ·
You and me? We're Kinda...

You and me? We're kinda like clones. We're both bearded n00bs working on Honda twins over the winter. Except I'm in a basement in 'Murica, my beard is a lil more grey, my bike is a CL450 and I'm nowhere near as dedicated to video documenting my work. I'm really, really glad you are, though, because watching these videos of yours helps me out a lot. Like, a lot lot.

I'm actually gonna tackle removing the wheels, sprocket, chain and forks this very evening.

One question: I hear/see that you're using a lot of standard size tools. My impression is that since it's a Honda everything should be in metric. Does this possibly mean that your bike was fitted back together by someone using standard bolts/nuts, etc.?

Here's a few shots of my bike and the inspiration bike I'm wanting to work towards:

This is the bike as we found it in a barn south of Madison, WI. After about 5 hours of tinkering, rebuilding carbs, setting the points, resetting the timing, replacing the fuel lines, rebuilding the petcock and cleaning out the tank a bit, I was able to take it on several rides. It was nice, but I felt pretty apprehensive about it because I'd not gone through every part looking for safety issues.


This is me being flummoxed by the damn wiring on this thing:


This is the bike in my basement with tank, seat and some other parts removed.


And the bike as it sits now.


And the inspiration bike, as found on Spin Cycle Industries.

 
#37 ·
You and me? We're kinda like clones. We're both bearded n00bs working on Honda twins over the winter. Except I'm in a basement in 'Murica, my beard is a lil more grey, my bike is a CL450 and I'm nowhere near as dedicated to video documenting my work. I'm really, really glad you are, though, because watching these videos of yours helps me out a lot. Like, a lot lot.

One question: I hear/see that you're using a lot of standard size tools. My impression is that since it's a Honda everything should be in metric. Does this possibly mean that your bike was fitted back together by someone using standard bolts/nuts, etc.?
Dude that's awesome haha.. Beard Brothers! lol.. I'm glad they are helping out, that gives me a huge vote of confidence, thanks man! I am a complete noob here too but have come a long way and I'm sure a lot of these guys are cringing watching me use tools/etc that don't fit, but it's all I have. Another gent on a different forum suggested that I get a set of Metric wrenches, but that's exactly what I have! My dads English.. So that's all he has. The bolts/screws on this bike are very perplexing! Some of the same bolts in the same places are different sizes, etc.. It's been weird and I plan on replacing all of them with the proper ones. I know there exists a bolt list, that someone gave to me on this site, so I will compile a chart at some point. I do believe that you are right in that someone put some of the parts back onto this bike with standard sizes.. It is good that I have completely dismantled the bike now so I can go through them all. I honestly feel so much better after having tackled this stuff. My brain works that way, I need to take something apart to fully understand how it works and as a result I feel totally connected to this bike now.

As for your second question about the rims/tires. I contacted a guy in California by the name of Kennie Buchanan who runs Buchanan's Spokes. He's pretty knowledgeable about rims/tires.. Anyway, he told me that he owns a CL350 and to not go any bigger than a 2.15 rim on the rear and a 1.85 on the front. This is his exact email:

I have a CL350 that have have made a similar upgrade to and am rather familiar with the bike. I used a 90/90 front tyre on a 1.85" rim and 100/90 on a 2.15" rear. It works perfectly (with Avon AM26 tyres) and I would recommend not going any wider, it won't go any faster but instead will become somewhat ponderous with the wider rear tyre.

I confirmed this fact with a few of my knowledgeable motorcycle builders I know. I am not completely familiar with your 450, but I would imagine the specs are quite similar to my 350 and would not recommend going too wide on the tires. To be honest with you, I really really wanted to.. but I was not willing to sacrifice the handling capabilities. There are a few really great guys on here that would probably be of more help you to, Outobie in particular will most likely confirm/concur with my opinion. I am quite familiar with your reference photo (one of the main reasons I decided to buy a CB350), and would bet that they probably have some handling issues with those fat tires.. even though they look badass! I have since purchased the exact rims and tires Kennie recommended and feel pretty good about it. Honestly though, if your looking for rim advice give Buchanan's an email, they are super helpful... ps - I am in no way affiliated with him or the company, just think they make good products and were really helpful with my questions.

Nice going on jumping in on your project by the way! Feels awesome right?! It's looking cool man and I hope you keep it up. If you have a post set up I will most def sub to it. Keep in touch man!
 
#35 ·
Wheels?

Another question:

What wheels do you plan to replace the stock ones with?

Reason for asking: I really want to use Coker Diamonds on my bike, but the stock rims I have aren't the right size. The problem is that the CL450, which is a "scrambler," has a 19" front wheel. The only Coker Diamond tire available in 19" is a 4.00, which I think may be too much out of spec for safety reasons for this bike. You probably won't have this problem as your CB's wheels are both 18".

I'm looking for rim/wheel replacements with drum brakes (CLs only had drum brakes) that will fit the smallest Coker Diamond tire available, which seems to be the 3.85x18 and which are reccommended for rim widths of 1.85" to 2".

Thoughts?
 
#41 ·
Another question:

What wheels do you plan to replace the stock ones with?

Reason for asking: I really want to use Coker Diamonds on my bike, but the stock rims I have aren't the right size. The problem is that the CL450, which is a "scrambler," has a 19" front wheel. The only Coker Diamond tire available in 19" is a 4.00, which I think may be too much out of spec for safety reasons for this bike. You probably won't have this problem as your CB's wheels are both 18".

I'm looking for rim/wheel replacements with drum brakes (CLs only had drum brakes) that will fit the smallest Coker Diamond tire available, which seems to be the 3.85x18 and which are reccommended for rim widths of 1.85" to 2".

Thoughts?
in the spirit of "please help me not f*ck up my..." that bike you picture as your inspiration is, from a ridability and safety standpoint F'd up. the coker tires are not meant for bikes like these...they are made for much older bikes that put out 8 HP have no moving suspension that top out at 38MPH. even if you get rims wide enough for them they still decrease performance and safety dramatically on your bike. also...no fork brace makes the handling even worse still. no I'm not done yet. he sawed off the frame brace ahead of the rear wheel as well to completely destroy any structural rigidity. Even worse still, look at the shortened rear shocks...notice that the rear axle is above a horizontal plane to the fork pivot and countershaft...when you give the bike throttle, the torque compresses the rear shocks and essentially locks out any rear suspension making the bike a hard tail. that bike is dangerous to ever ride above 10MPH and is nothing more than garage art.
 
  • Like
Reactions: dtsmjr8dan